Old-Fashioned Fudge Recipe
Old-Fashioned Fudge Recipe
There is something timeless about a pan of homemade fudge cooling on the kitchen counter. Long before complicated dessert recipes filled cookbooks and social media feeds, simple candy recipes like this one were often passed from one generation to the next. Old-fashioned fudge has a way of bringing that same cozy feeling into the kitchen today.
This recipe is wonderfully straightforward. A handful of familiar ingredients—sugar, cocoa, butter, evaporated milk, and vanilla—come together on the stovetop to create a rich chocolate treat with that classic homemade fudge character. Optional nuts can be added if you enjoy a little crunch in every bite, or you can leave them out for a smooth and creamy texture.
One of the things that makes this recipe especially appealing is how quickly it comes together. According to the original recipe, you can have great fudge in less than 20 minutes. That makes it a wonderful choice when you want a homemade dessert without spending an entire afternoon in the kitchen.
This is the kind of recipe that feels right at holiday gatherings, family celebrations, bake sales, potlucks, or simply when you want a little something sweet after dinner. Cut into small squares, it is easy to arrange on a dessert platter or package up as a thoughtful homemade treat.
If you love traditional chocolate desserts and recipes that remind you of simpler days, this old-fashioned fudge deserves a place in your recipe collection.
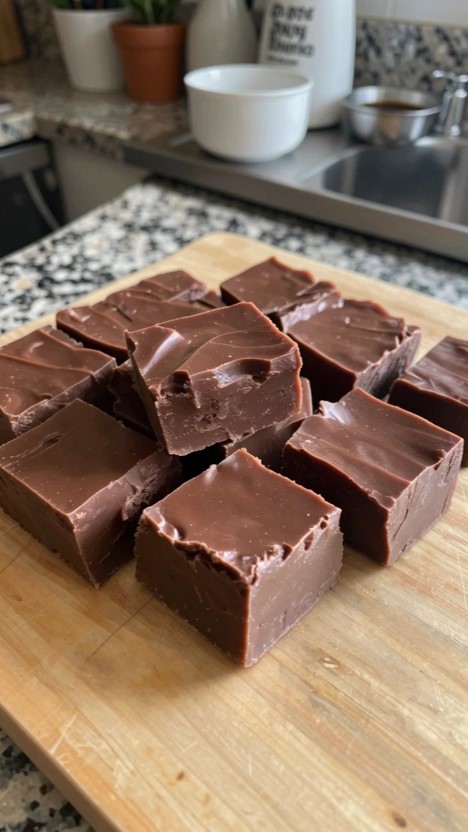
Old-Fashioned Fudge
Ingredients
- 2 cups sugar
- 4 Tablespoons Hershey’s cocoa
- 1 stick of salted butter
- 5 ounce can of Carnation Evaporated Milk
- 1 teaspoon of vanilla
- Nuts are optional
Instructions
- Mix sugar and cocoa in a saucepan, then add a stick of butter and the can of evaporated milk, and stir until the mixture starts boiling.
- Stir continuously for 7 minutes, then remove from heat and add vanilla. Stir the mixture continuously for another 3 minutes.
- Pour into a buttered baking dish to set.
Great fudge in less than 20 minutes!
Why You’ll Love This Old-Fashioned Fudge
This recipe is a wonderful example of how a few everyday ingredients can create something that feels special.
The cocoa provides the deep chocolate flavor, while the butter adds richness. Evaporated milk helps create the smooth, traditional fudge texture, and vanilla adds a subtle finishing note that rounds out the chocolate.
Another advantage is the short ingredient list. You do not need a pantry full of specialty ingredients to make this dessert. The recipe relies on familiar staples, making it a practical choice when you want homemade fudge without a trip to the store for unusual ingredients.
The recipe also gives you the option of adding nuts. This small choice allows you to make the fudge according to your preference. Nut lovers can enjoy the extra texture, while those who prefer smooth chocolate fudge can leave them out.
Tips for Making Homemade Fudge
Because this is a stovetop candy recipe, paying attention while the mixture is cooking is important. Once the mixture begins boiling, follow the stated cooking and stirring instructions carefully.
Continuous stirring is part of the process. Staying with the saucepan helps keep the mixture moving and allows you to monitor it as it cooks.
Have your buttered baking dish ready before you finish cooking the fudge. Once the mixture is ready, you can transfer it immediately rather than scrambling to prepare the dish at the last moment.
A sturdy saucepan and a reliable spoon or spatula can make stirring more comfortable. Since the mixture becomes hot, use appropriate caution while working around the saucepan.
When the fudge is poured into the baking dish, spread it evenly if necessary so that the finished pieces have a consistent thickness.
Most importantly, give the fudge enough time to set before attempting to cut it. Trying to slice it while it is still too soft can make it difficult to achieve neat squares.
Adding Nuts or Keeping It Smooth
The recipe makes nuts optional, which means you can easily adapt the finished fudge to your preference.
Chopped nuts can provide a pleasant contrast to the soft chocolate fudge. Walnuts and pecans are common choices for chocolate desserts, although the best option is ultimately the one you enjoy.
If you are serving the fudge to a group, leaving the nuts out can be a simple way to keep the recipe more broadly appealing. Alternatively, you can divide a batch into portions and add nuts to one portion if you want to offer two textures.
For a classic smooth chocolate fudge experience, simply follow the recipe without nuts.
When to Serve Old-Fashioned Fudge
Homemade fudge is naturally suited to celebrations.
During the holidays, arrange small squares on a dessert tray alongside cookies and other candies. The rich chocolate color provides a beautiful contrast against lighter desserts.
Fudge also makes a thoughtful homemade gift. Once completely set, cut it into small squares and place the pieces in a food-safe container. A simple package of homemade fudge can be a lovely way to share something from your kitchen with friends, family, neighbors, or coworkers.
For everyday occasions, serve a few pieces with coffee or tea. Because fudge is rich, small portions can be wonderfully satisfying.
It is also a useful recipe for potlucks and family gatherings because one baking dish can provide plenty of bite-sized pieces for sharing.
How to Get Neat Fudge Squares
Presentation can make a homemade dessert feel extra special.
Allow the fudge to set completely before cutting. Use a sharp knife and make deliberate cuts to create evenly sized squares.
For a cleaner appearance, wipe the knife between cuts if chocolate begins to build up on the blade. You can decide whether you prefer larger dessert squares or smaller bite-sized pieces.
Smaller pieces are particularly useful for parties and dessert trays because guests can take a piece without committing to a large serving.
If you are preparing the fudge as a gift, uniform squares can give the finished treat a polished, homemade look.
Storage Tips
Once the fudge has completely set, keep it covered in an airtight container to help maintain its texture and freshness.
If you are stacking multiple layers, placing parchment or wax paper between the layers can help prevent the pieces from sticking together.
For a party, the fudge can be prepared ahead of time and stored covered until it is ready to serve. This can be especially helpful during busy holiday cooking when you want to get some desserts finished in advance.
Keep the fudge protected from excessive heat so the pieces maintain their shape and texture.
Frequently Asked Questions
Can I make this fudge without nuts?
Yes. The recipe specifically states that nuts are optional. You can leave them out if you prefer smooth chocolate fudge.
How long does this fudge take to make?
The recipe states, “Great fudge in less than 20 minutes!” The cooking process includes seven minutes of continuous stirring after the mixture starts boiling, followed by another three minutes of stirring after removing it from the heat.
Why do I need to stir the mixture continuously?
Continuous stirring is part of the recipe’s cooking process. It keeps the mixture moving while it cooks and helps you monitor the fudge as it heats.
When can I cut the fudge?
The recipe instructs you to pour the mixture into a buttered baking dish to set. Allow it to become firm enough to hold its shape before cutting it into pieces.
A Classic Chocolate Treat
Some recipes never really go out of style. Old-fashioned fudge is one of them.
There is something satisfying about taking a few simple ingredients and turning them into a rich chocolate dessert that can be shared with the people around you. This recipe keeps things uncomplicated, making it a practical choice for both experienced cooks and anyone who enjoys traditional homemade sweets.
The combination of cocoa, butter, sugar, evaporated milk, and vanilla creates the familiar flavor that makes chocolate fudge so comforting. Add optional nuts for extra texture, or keep the recipe smooth and simple.
Best of all, you do not need to reserve this recipe for a major celebration. It is quick enough for an ordinary afternoon but special enough for holidays, parties, and homemade gifts.
So the next time you are craving a classic chocolate treat, pull out your saucepan and give this old-fashioned fudge recipe a try. A short list of ingredients and a little time at the stove can result in a dessert that feels wonderfully nostalgic.